Group leader instructions

Playlist for Life’s training platform has been set up so that that it easy for you to add your students and monitor their progress. This page gives step-by-step instructions for everything you may need to do. 

Download me!

These instructions are also available to download as a pdf. Just lick the icon to the left.


What is a group leader?

Every group of students has a Group Leader. That’s you. It’s your job to add students to the system and monitor their progress.

You do this via the Group Dashboard page of our training platform: https://training.playlistforlife.org.uk/groups-dashboard/.

As a Group Leader you will be taken directly to that page every time you log in.

Most Group Leaders will only have one Group in their Dashboard. But if you manage different cohorts of students we may have set up more than one Group for you. If you do have multiple Groups make sure you choose the correct one when adding new students or checking the progress of students.

Video guide

The video below walks you through the steps to add your students to your course. If you prefer written instructions simply scroll down. 

Registering students There are three ways to register students. You can pick whichever way is most suitable for you and your students.
  • Add students one at a time
  • Upload a batch of students
  • Generate a code and allow students to register themselves


Option 1:  add students one at a time

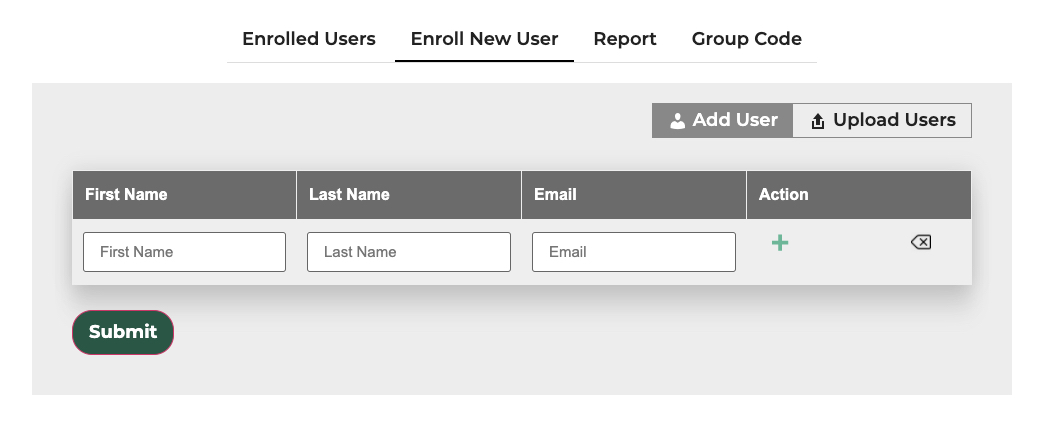
If you only have a handful of students this way may be suitable.
  • Log into your account and make sure you are on the Group Dashboard page
  • Click the ‘Enrol New User’ tab. The table below will appear.
A screenshot of the table where group leaders can add new students
  • Type in the first name, last name, and email address of your first student in the boxes
  • If you want to enter more than one student click the + symbol to add a new row to the table and repeat the step above
  • When you have entered all your students click the Submit button
  • Each student will be added to the eLearning and each student will be sent an email containing their login details and instructions for accessing the course.


Option 2:  upload a batch of students

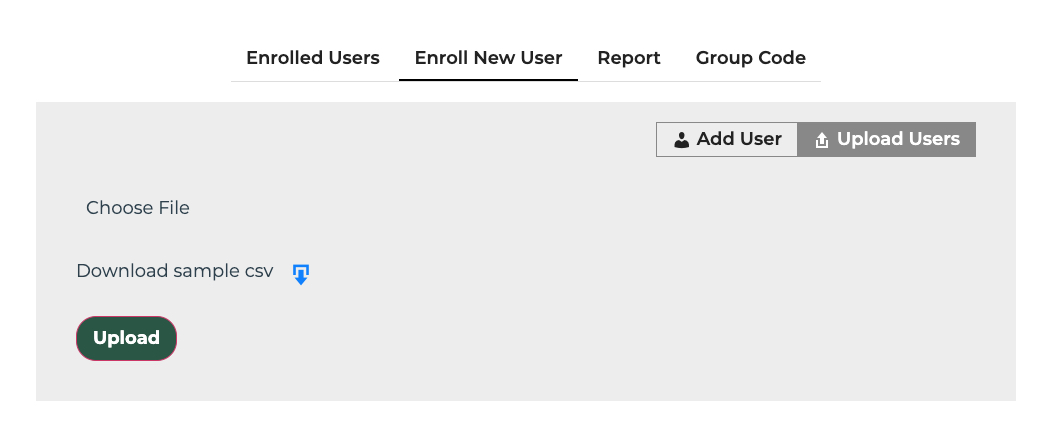
This way may be simplest if you have lots of students and want to make the registration as simple as possible for them. 
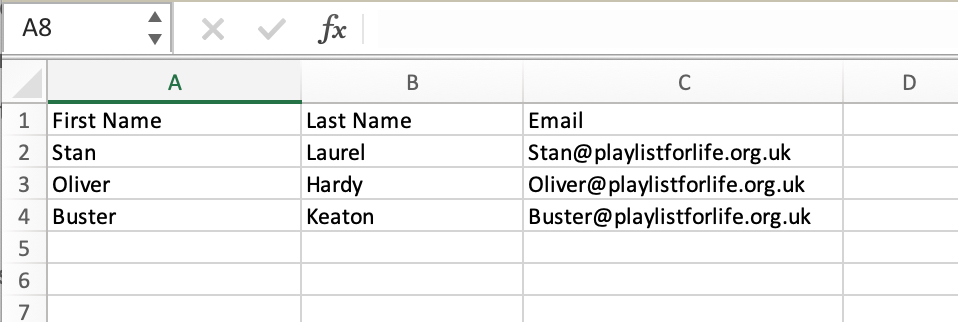
Firstly, you will need to prepare a spreadsheet of all the students. The first three columns must be labelled ‘First Name’ / ‘Last Name’ / ‘Email’ as per the example below. You can download a template spreadsheet from the Group Dashboard page. A screenshot showing the format of a spreadsheet for uploading students Once your spreadsheet is ready, save it as a csv file. You can do that in Excel by selecting ‘Save As…’ from the file menu and then choosing .csv from the file format option.
  • Log into your account and make sure you are on the Group Dashboard page
  • Click ‘Enrol New User’ and then click the ‘Upload Users’ You will see this panel:
A screenshot of the bulk uploader on this website
  • Click the ‘Choose File’ link and select the csv file you prepared earlier.
  • Click the ‘Upload’ button
  • A message will appear at the top of the screen if the upload is successful. If a problem has occurred a message will tell you what went wrong. The most common issues are that one or more email addresses are not valid or that the csv file is not correctly formatted. Make sure you haven’t uploaded a spreadsheet in excel format.
  • Each student will be added to the eLearning and an email will be sent to their email address containing their login details and instructions for accessing the course.
You can confirm your students have been uploaded correctly by clicking the ‘Enrolled Users’ tab and checking the list.


Option 3:  students add themselves

If you would rather students add themselves to the system you can do that easily by generating a code which you then email to your group. The code acts as a key that allows the students access. The same code is used for all your students; you do not need to generate an individual code for each student.

  • Log into your account and make sure you are on the Group Dashboard page
  • Click the ‘Group Code’ The form below will appear.
A screenshot showing the group code panel of this website
  • Click the ‘Generate’ button to generate your code. Do not enter a code yourself as it may conflict with other codes already in the system.
  • You can then select a timeframe for when registration will be open. Enter a start date and end date in the ‘From’ and ‘To’ fields. Note that this is simply the period in which students can register. Students who register within this period will continue to have access after the end date you have chosen.
  • You have the option to set the Validation rules if you wish but this is completely optional. These allow you to specify an IP address and / or an email domain for students. For example, if you only wish students to access the course while using your Library network you could set the IP address of your library. Or if you wish to restrict students to using their university / college email accounts to register then you would enter the appropriate email domain (e.g. my_college.ac.uk).
  • You must set the Status switch to on so that it turns blue otherwise your code will not work.
  • Finally, press the ‘Submit’ button and your code will be registered.
  • Please do then confirm that the Status is set to on. If it is not your code will not work.
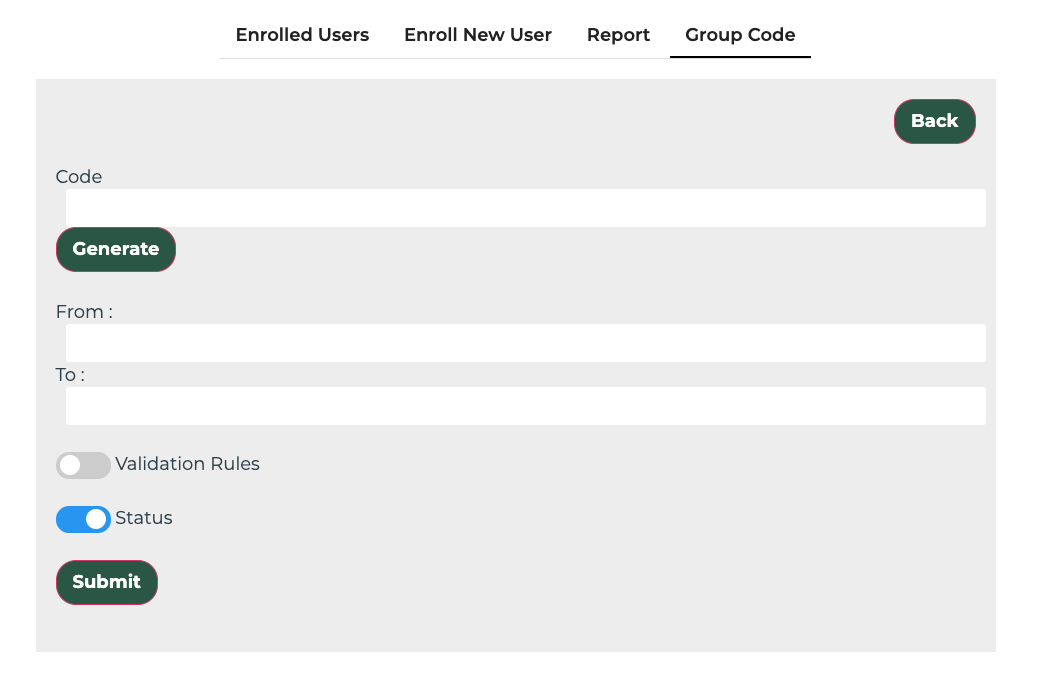
You should then contact your students, give them the code, and direct them to sign up using the code at our Group Registration page here: https://training.playlistforlife.org.uk/group-registration/ Students choose their own username and password. The code you have generated will tell the system which course they have access to and will assign you as their Group Leader. 

Monitoring Progress

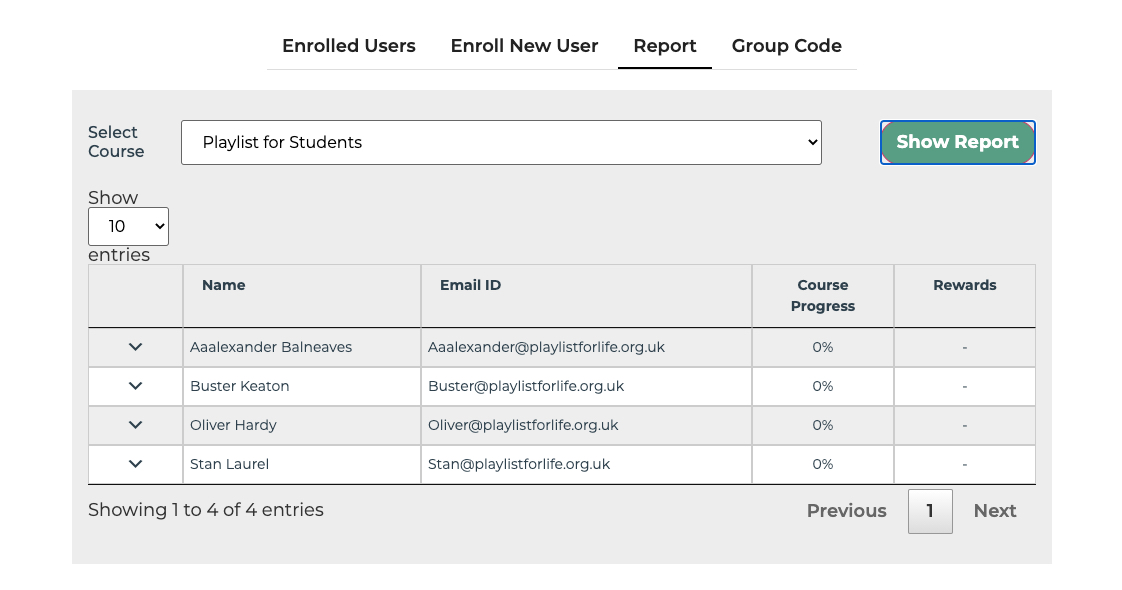
You can track the progress of your students to see what stage they are at and who has completed the training.

  • Log into your account and make sure you are on the Group Dashboard page
  • Click the ‘Report’
  • If it is not already selected then choose ‘Playlist for Students’ from the drop-down menu next to ‘Select Course’.
  • Click the ‘Show Report’ button
  • You will see a table showing the percentage progress of each student. If a student has successfully completed the course a badge will appear in the Rewards tab. You can click the badge to view their Certificate.

A screenshot of the report page of this website

Other tasks

As well as the tasks listed above you can also:

  • Send a student a reminder email with their login details
  • Remove a student from the course completely

To do either of these go to the ‘Enrolled Users’ tab, find the student in the list (or use the search field to search for their name), then click one of the options in the right hand column. ‘Re-invite’ will send the student a reminder email. ‘Remove’ will remove them completely from the course.